

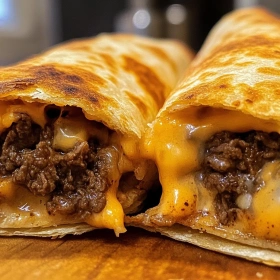
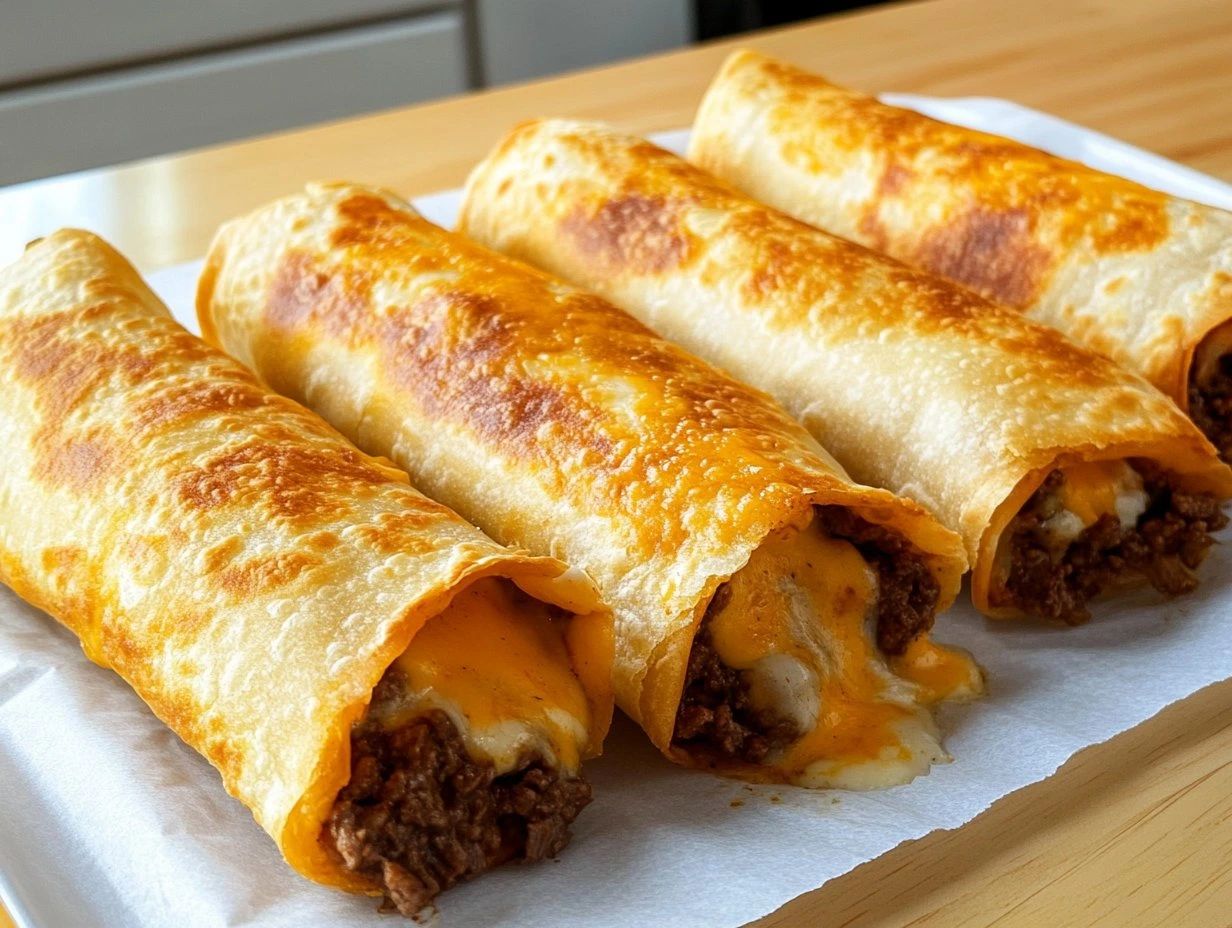
Crispy Beef and Cheese Chimichangas are a glorious Tex-Mex comfort dish: stuffed tortillas filled with seasoned beef and cheese, then fried until the shell turns crisp, blistered, and deeply golden. You should make them because every bite gives you that perfect contrast of crackly exterior, molten center, and savory, spiced richness that feels like a restaurant treat at home. I fell for this dish the first time I heard that satisfying sizzle in the pan and watched the tortilla puff into a bronzed, irresistible parcel. Finished with cool crema, fresh salsa, or a scatter of herbs, they’re pure edible celebration.
Why I Love This Recipe
What I love most about chimichangas is how they sit at the crossroads of borderland cooking and pure indulgence. They carry the spirit of Tex-Mex kitchens—practical, generous, and fearless with flavor—while the frying technique transforms humble tortillas into something almost pastry-like. As a chef, I’m fascinated by that moment when the seam seals, the surface blisters, and the filling stays luxuriously juicy inside. It reminds me of late-night restaurant food: hot, loud, fragrant with cumin and garlic, and impossible to stop eating. There’s a kind of culinary theater here, too—the crisp shell cracking open to reveal beef, cheese, and steam. That contrast never gets old.
What You Need From Your Kitchen
Large skillet or Dutch oven
Needed to maintain steady frying temperature so the tortillas blister evenly and turn crisp without absorbing excess oil
Tongs
Essential for turning the chimichangas safely and keeping the seams intact while the shells brown
Heavy-bottomed sauté pan
Best for cooking the beef filling evenly and reducing moisture so the tortillas stay crisp
Wire rack
Lets excess oil drain away and preserves that shatteringly crisp exterior instead of trapping steam
Instant-read thermometer
Helps you keep the oil in the ideal frying range for a golden, non-greasy finish
Perfect Pairings
Mexican rice
Its tomato-rich, savory grains echo the spiced beef filling and balance the richness of the fried tortilla
Pico de gallo
The bright acidity and fresh tomato crunch cut through the cheese and lift every bite
Margarita or Mexican lager
Both drinks refresh the palate and complement the smoky, salty, fried flavors beautifully
Refried beans
Their creamy texture makes the plate feel complete and adds a comforting, classic Tex-Mex side
Game day or casual dinner party
These chimichangas are ideal when you want a crowd-pleasing centerpiece with bold flavor and a fun, hands-on feel
Pro Tips
- Brown the beef deeply before seasoning it. Those caramelized bits build the smoky, savory backbone that makes beef and cheese chimichangas taste bold instead of flat.
- Let the filling cool just enough to thicken before rolling. A hot, loose filling steams the tortilla from the inside, while a slightly set mixture gives you a tighter, cleaner wrap.
- Brush or dab the tortilla edges lightly with water or egg wash before sealing. That small bit of moisture helps the seam fuse, which is essential for a neat fry and less filling leakage.
- Fry seam-side down first so the seal sets immediately in the oil. Once that edge crisps, the chimichanga holds its shape and develops that gorgeous, even golden crust.
- Don’t overcrowd the pan or fryer. Keeping space around each chimichanga maintains oil temperature, which is the difference between a crisp, blistered shell and a heavy, oil-soaked one.
🍳 Your Cooking Progress
Ingredients Gathered
0/14 CompleteCooking Steps
0/7 CompleteRecipe Mastery
0% CompleteCrispy Beef and Cheese Chimichangas
Crispy Beef and Cheese Chimichangas are rolled tight, then fried until blistered and deeply bronzed for that signature crunch. The savory beef filling, melty cheese, and fresh toppings create a bold Tex-Mex contrast that feels both indulgent and vibrant.
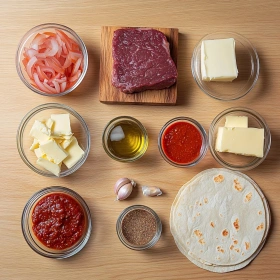
Ingredients
💡 Click on ingredients to check them off!
- 1 pound ground beef
- 1 tablespoon extra-virgin olive oil
- 1 small yellow onion, finely diced
- 2 cloves garlic, minced
- 2 tablespoons tomato paste
- 1 tablespoon chili powder
- 1 teaspoon ground cumin
- 1/2 teaspoon smoked paprika
- 1/2 teaspoon kosher salt
- 1/4 teaspoon freshly ground black pepper
- 1 cup shredded Monterey Jack cheese
- 1 cup shredded cheddar cheese
- 6 large flour tortillas
- 2 tablespoons melted unsalted butter
Instructions
💡 Click on steps to mark as complete!
-
1Build the savory fillingWarm the olive oil in a skillet over medium heat, then soften the onion until translucent and fragrant. Add the garlic, tomato paste, and spices, cooking briefly to bloom their flavor so the beef filling tastes deep, rounded, and not raw or dusty.
-
2Brown the beef properlyAdd the ground beef and break it into fine crumbles with a wooden spoon. Cook until no pink remains and the pan looks glossy, then season with salt and pepper. If excess fat pools, drain it lightly so the chimichangas stay crisp, not greasy.
-
3Melt in the cheeseRemove the skillet from the heat and fold in the Monterey Jack and cheddar while the filling is still hot. The cheese should soften into the meat, creating a cohesive, spoonable mixture that clings together without becoming runny or overworked.
-
4Warm and fill the tortillasHeat the flour tortillas briefly so they become supple and easy to roll without cracking. Spoon the beef mixture down the center of each tortilla, leaving clean borders at the edges, which helps prevent blowouts during frying and keeps the seam neat.
-
5Roll tightly and sealFold the sides inward, then roll each tortilla into a compact cylinder, tucking the filling firmly as you go. Brush the final edge with melted butter to help it seal, and place seam-side down so the package holds its shape in the oil.
-
6Fry to a golden crustHeat oil to 350°F in a deep skillet or Dutch oven and fry the chimichangas in batches, turning carefully until evenly blistered and deeply golden. Maintain steady heat for a shatteringly crisp shell with a tender, steamy interior.
-
7Drain and serve hotTransfer the chimichangas to a wire rack or paper towels to shed excess oil while preserving the crust. Let them rest for a minute, then slice if desired and serve with salsa, sour cream, or guacamole for a bright, creamy contrast.
Nutrition Facts (Per Serving)
Chef's Notes
- For make-ahead beef and cheese chimichangas, cool the filling completely before assembling. Warm filling traps steam, which softens the tortilla and can cause the seam to split during frying or baking.
- If refrigerating assembled chimichangas, wrap each one tightly and chill seam-side down. This helps the tortilla set around the filling, so the crisp shell stays intact when it hits the hot oil.
- To freeze, assemble the chimichangas without frying, then freeze on a tray until firm before bagging. Fry or bake straight from frozen for the best shatteringly crisp exterior and molten center.
- If your beef mixture seems loose, stir in a little extra shredded cheese or let it simmer briefly to reduce. A drier filling keeps the tortilla from tearing and prevents greasy blowouts.
- Leftover chimichangas reheat best in an oven or air fryer, not the microwave. Dry heat restores that golden, blistered crust while keeping the beefy, cheesy filling rich and savory.